If you’ve noticed white residue on your faucets, dry skin after showering, or spots on your clean dishes, hard water might be to blame. Hard water contains high levels of minerals like calcium and magnesium. While it’s safe to drink, it can wreak havoc on your plumbing and appliances over time.
In fact, the U.S. Geological Survey reports that over 85% of homes in the United States have hard water, and Pennsylvania is no exception, especially in areas like Harrisburg.
Why Install a Water Softener in the First Place?
Installing a water softener can make a big difference. Not only does it extend the life of your plumbing and water-based appliances, but it can also improve the feel of your water, reduce soap scum, and lower the amount of detergent and energy needed for cleaning.
It’s a smart home upgrade with long-term benefits for comfort, efficiency, and cost savings.
What to Know Before You Start Installation
Before diving into installation, it’s important to prepare both your tools and your plan. Start by identifying where the softener will go.
The best spot is typically where the main water line enters your home, ideally near your water heater, close to a drain, and within reach of a standard electrical outlet. This location ensures softened water flows throughout your home and that the unit functions properly.
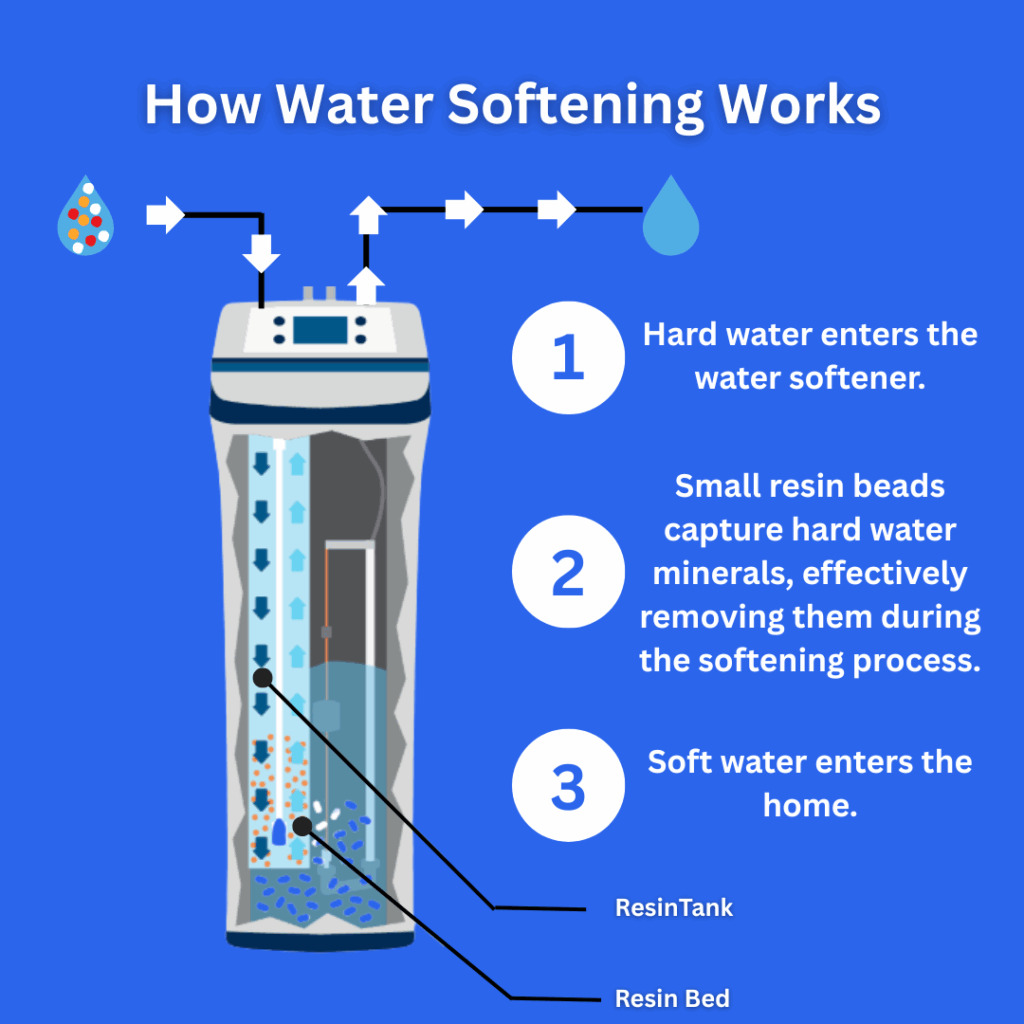
There are two main types of systems: salt-based and salt-free. Salt-based systems are the most common and are highly effective at removing hard minerals using ion exchange. Salt-free units don’t remove minerals but help reduce scale buildup.
For a household of four, a system rated at 30,000 to 40,000 grains should be sufficient.
Budgeting is also key. Most whole-house water softener installation units range from $700 to $5,000, depending on size and features.
Maintenance is relatively low-cost, with yearly expenses averaging around $50 to $300 for salt and cleaning products.
How to Install a Water Softener
Step 1: Turn Off the Water Supply
Begin by turning off the main water supply to your home. Open a faucet to relieve any built-up pressure and unplug your water heater to avoid damage during the process.
Keep towels and a bucket nearby to catch any water that might spill when you cut the pipes.
Step 2: Cut Into the Main Water Line
Use a pipe cutter to carefully cut into your main water line at the chosen location. Make sure the cut is clean and straight. Insert a tee fitting or elbow to begin the loop that will direct water through your softener.
Step 3: Connect the Bypass Valve
The bypass valve lets water flow around the unit if maintenance is needed later. Attach it securely to the softener, being careful not to overtighten. Many systems come with pre-attached bypass valves, but double-check your connections.
Step 4: Hook Up the Water Softener
Connect the inlet and outlet ports of the softener to your home’s water line. These are usually marked “in” and “out.” Use flexible tubing or copper piping depending on your system.
It’s helpful to dry-fit everything before tightening to make sure your connections line up correctly.
Step 5: Connect the Drain Line
Attach a drain hose to the softener’s drain port and run it to a nearby utility sink or floor drain. Make sure the drain line includes an air gap—this prevents any used water from flowing backward into your system.
Secure the hose with a clamp and check that it slopes downward without kinks.
Step 6: Plug It In and Flush the System
With the plumbing complete, plug in the softener and slowly turn the main water back on. Set the softener to “bypass” and inspect all fittings for leaks. Once everything looks good, follow the manufacturer’s instructions to start a full regeneration cycle.
This will clean out the system before use. After that, test your water to make sure the softener is working properly.
Avoiding Common Mistakes During Installation
Even with clear instructions, it’s easy to overlook key steps that can lead to bigger issues. One of the most common mistakes is connecting the inlet and outlet in reverse, which can prevent the softener from working altogether.
Some homeowners skip the initial flush cycle, which could leave sediment or debris inside the tank.
Another issue is forgetting to test your water pressure beforehand. Most systems work best between 40 and 100 psi. If your pressure is too high or too low, you may need a regulator or booster. And always make sure the drain line includes an air gap to avoid contamination.
Taking the time to get it right the first time can save you hours of troubleshooting later on.
Other Recommended Maintenance
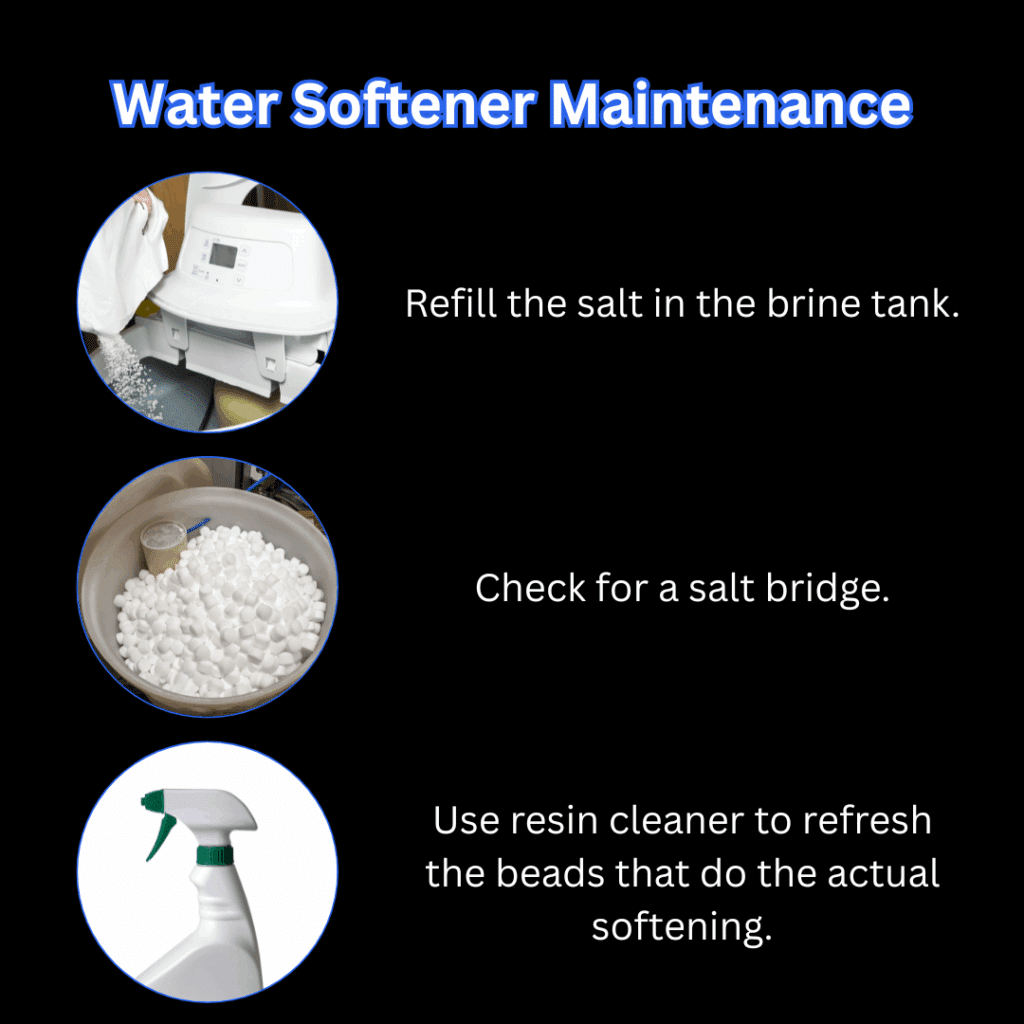
Once your water softener is up and running, keeping it maintained is simple, but important. The most frequent task is refilling the salt in the brine tank.
Depending on your water use, you might need to top it off once a month. When you do, check for a “salt bridge,” which is a hardened layer of salt that can block proper function. Gently break it up if needed.
Once or twice a year, clean the brine tank with a mild bleach solution and rinse it thoroughly. You can also use resin cleaner to refresh the beads that do the actual softening.
If you notice your water getting harder again, test it using water hardness strips available online or at hardware stores.
Routine maintenance keeps your water softener working well and helps extend its lifespan, often to 10 years or more.
When to Call a Professional
Installing a water softener can be manageable for confident DIYers, but it’s not for everyone. If you’re unsure about working with plumbing, cutting into your main water line, or dealing with electrical components, calling a licensed professional is the safest route.
In some areas, permits or code requirements may apply. Skipping these steps could void your home insurance or cause problems when selling your house.
A professional can ensure everything is up to code and functioning properly, giving you peace of mind and protecting your investment.
Conclusion
Installing a water softener is one of the most effective ways to improve your home’s water quality. It protects your pipes, helps your appliances last longer, and leaves you with cleaner, softer water for everyday use. With a little planning and the right tools, many homeowners can take this on themselves.
Still, there’s no shame in calling in a professional when needed, especially if you want the job done quickly and correctly the first time.
If you’re dealing with hard water in your Harrisburg home and need guidance or expert help, the licensed team at Enviroquest Harrisburg is ready to support you.